Showing posts with label Makes. Show all posts

Wednesday, 11 January 2012

Love Egg Cosies!


Egg cosies Set Number Two. 

I Love, love, love these so much, so cute!
These LOVE felt egg cosies are also hand made from the lovely and  talented Ness.
(see earlier post)


Before 
Eggs looking really sad, cold and lonely.


After
Now the eggs are lovely, warm and snuggly.


Hand made and stitched with felt.

V
E

L O - Why am I writing this, you can clearly see the letters!


Spotty egg cups hiding underneath.


And the little ones couldn't resist playing with their toys and the egg cups again.


Good parking spot for trains.


Egg cups are also handy for storing marbles and train batteries. 


Have a eggcellent day.
hehe


Can you imagine a wedding breakfast with loads and loads of vintage egg cups, toast racks, mix matched vintage china, loads of teapots, jams, teacakes, big English breakfast.


Oooooh that would be nice.


Except how early would the bride have to get up to get ready for a breakfast wedding.


Yikes.


Bad idea!


Becca 


x


Tuesday, 10 January 2012

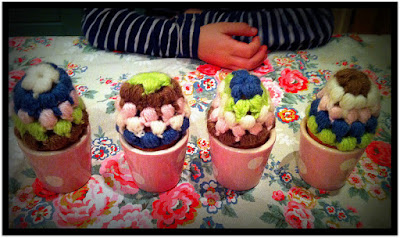
Cute Egg Cosies.


My lovely sister in law Ness makes absolutely everything. 
I was lucky enough to get loads of hand made gifts this year. One of my favourite makes was this really cute egg cosy set.
It went down well with the wee ones too.


Can you guess who wanted to play with them?

 Is everything a toy with children?


Can you believe wee boys would be arguing over crocheted egg cosies.
You have to laugh really.


                Crocheted in lovely neutral shades.


These are mine!


One.


Two.


Three.


Four.


This little one wants more.


Playing with his eggs.


 Pink spotty egg cups and floral Cath Kidston fabric.


Ok, I should really finish this post here.

If you love china only - this is the end.
Do not read any more.
.
.
.
.
.
.
.

Especially if you don't like monsters.
                                

With an egg cosy on his head!


More Ben 10 figures with egg cosies.


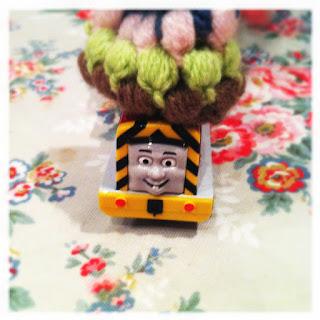
 And then we have the new cosy train collection.


 Just what you needed to see.


Sorry, Salty and Henry had a little bit of personal time with the egg cosies.


I told you not to look, cheeky little ones, 
What would my sister in law say!


Sorry, Ness.
I am honestly taking good care of them!


x


Friday, 8 July 2011

Vintage Paper Bunting,


Vintage Paper Bunting.

  Why not try this quick way of making your own paper bunting
using pretty floral paper. You don't need much. 
Just patterned paper, scissors, ruler, glue and pretty ribbon.


Measure a triangle on paper or card and cut out.


Use a pretty selection of floral paper for your triangles.
(We used Cath Kidston)


 A variety of different laces to experiment with.


Pretty doily paper triangles.


Evenly glue your triangles apart to ribbon.

This is just something quick and easy to make. The bunting would look so much prettier if you used patterned scissors for the edging of the bunting. Alternately you could also sew the edges of the paper.


It is so light that you can use tape to stick the bunting up with.


 We made loads.


 Have a fun day.

xxx

Friday, 1 July 2011

Paper Doily Sweet Cones,


Paper Doily Sweet Cones.

Really had good fun making these white paper doily sweet cones for a Summer Prom yesterday. 
They are easy to make and not too expensive!

Materials needed:
pretty paper doilies,
scissors,
glue,
tape,
ink,
and a stamper kit.

** You can also decorate them with anything**
(I used photocopied butterflies)


I am a wee bit in love with this vintage Family Printing set.
You can use modern stamper sets too, which work just as well.


Really love my other printing stamper set too. 
I have had it for ages and it has been so useful. 
You do need tweezers to get the letters in and out though.


Instructions just in case.

1.Fold the paper doily in half and then cut it on the fold.
2. If you are stamping a message on your cone, this is the best time to do it while it is flat.
3. Roll the doily into the cone shape, this takes practice to get the hang of the right shape.
4. Tape it on the inside.
5. Glue it on the outside to make the ends nice and smooth.
** you can decorate it with anything you fancy now **
( I used a photocopy of a butterfly for my cones)
6. Fill it with sweets or confetti or anything.
7. Eat the sweets.


Paper doily overload, I used the round ones as opposed to the rectangle doilies.


Had to make 110 in total.


And stack them up


into piles.


Detailed shots of the intricate paper pattern.


Different ways of displaying the doily sweet cones.


Transported them carefully in stacks.


I put these paper cones in a large vintage glass bowl.


Paper doilies full of yummy sweets.

More photographs to follow of sweet table.


I had to put this photo in below of a paper doily full of sweets and a Corona beer!

Made me laugh.


Take care for now.


xxx


Related Posts Plugin for WordPress, Blogger...